pro micro 5v 16m 要選 “SparkFun AVR Boards”
一、下載開發板定義
先在Arduino IDE中,點擊“文件”→“首選項”,在“附加開發板管理器網址”當中輸入以下內容並保存
然後在IDE主界面點擊“工具”→“開發板……”→“開發板管理器”,安裝“SparkFun AVR Boards”
最後在“工具”→“開發板……”中選中“SparkFun Pro Micro”,並在“處理器……”中根據板子尾部晶振上標註的頻率選中對應的處理器即可(一般是ATmega32U4 5V 16MHz)
最後在“工具”→“開發板……”中選中“SparkFun Pro Micro”,並在“處理器……”中根據板子尾部晶振上標註的頻率選中對應的處理器即可(一般是ATmega32U4 5V 16MHz)
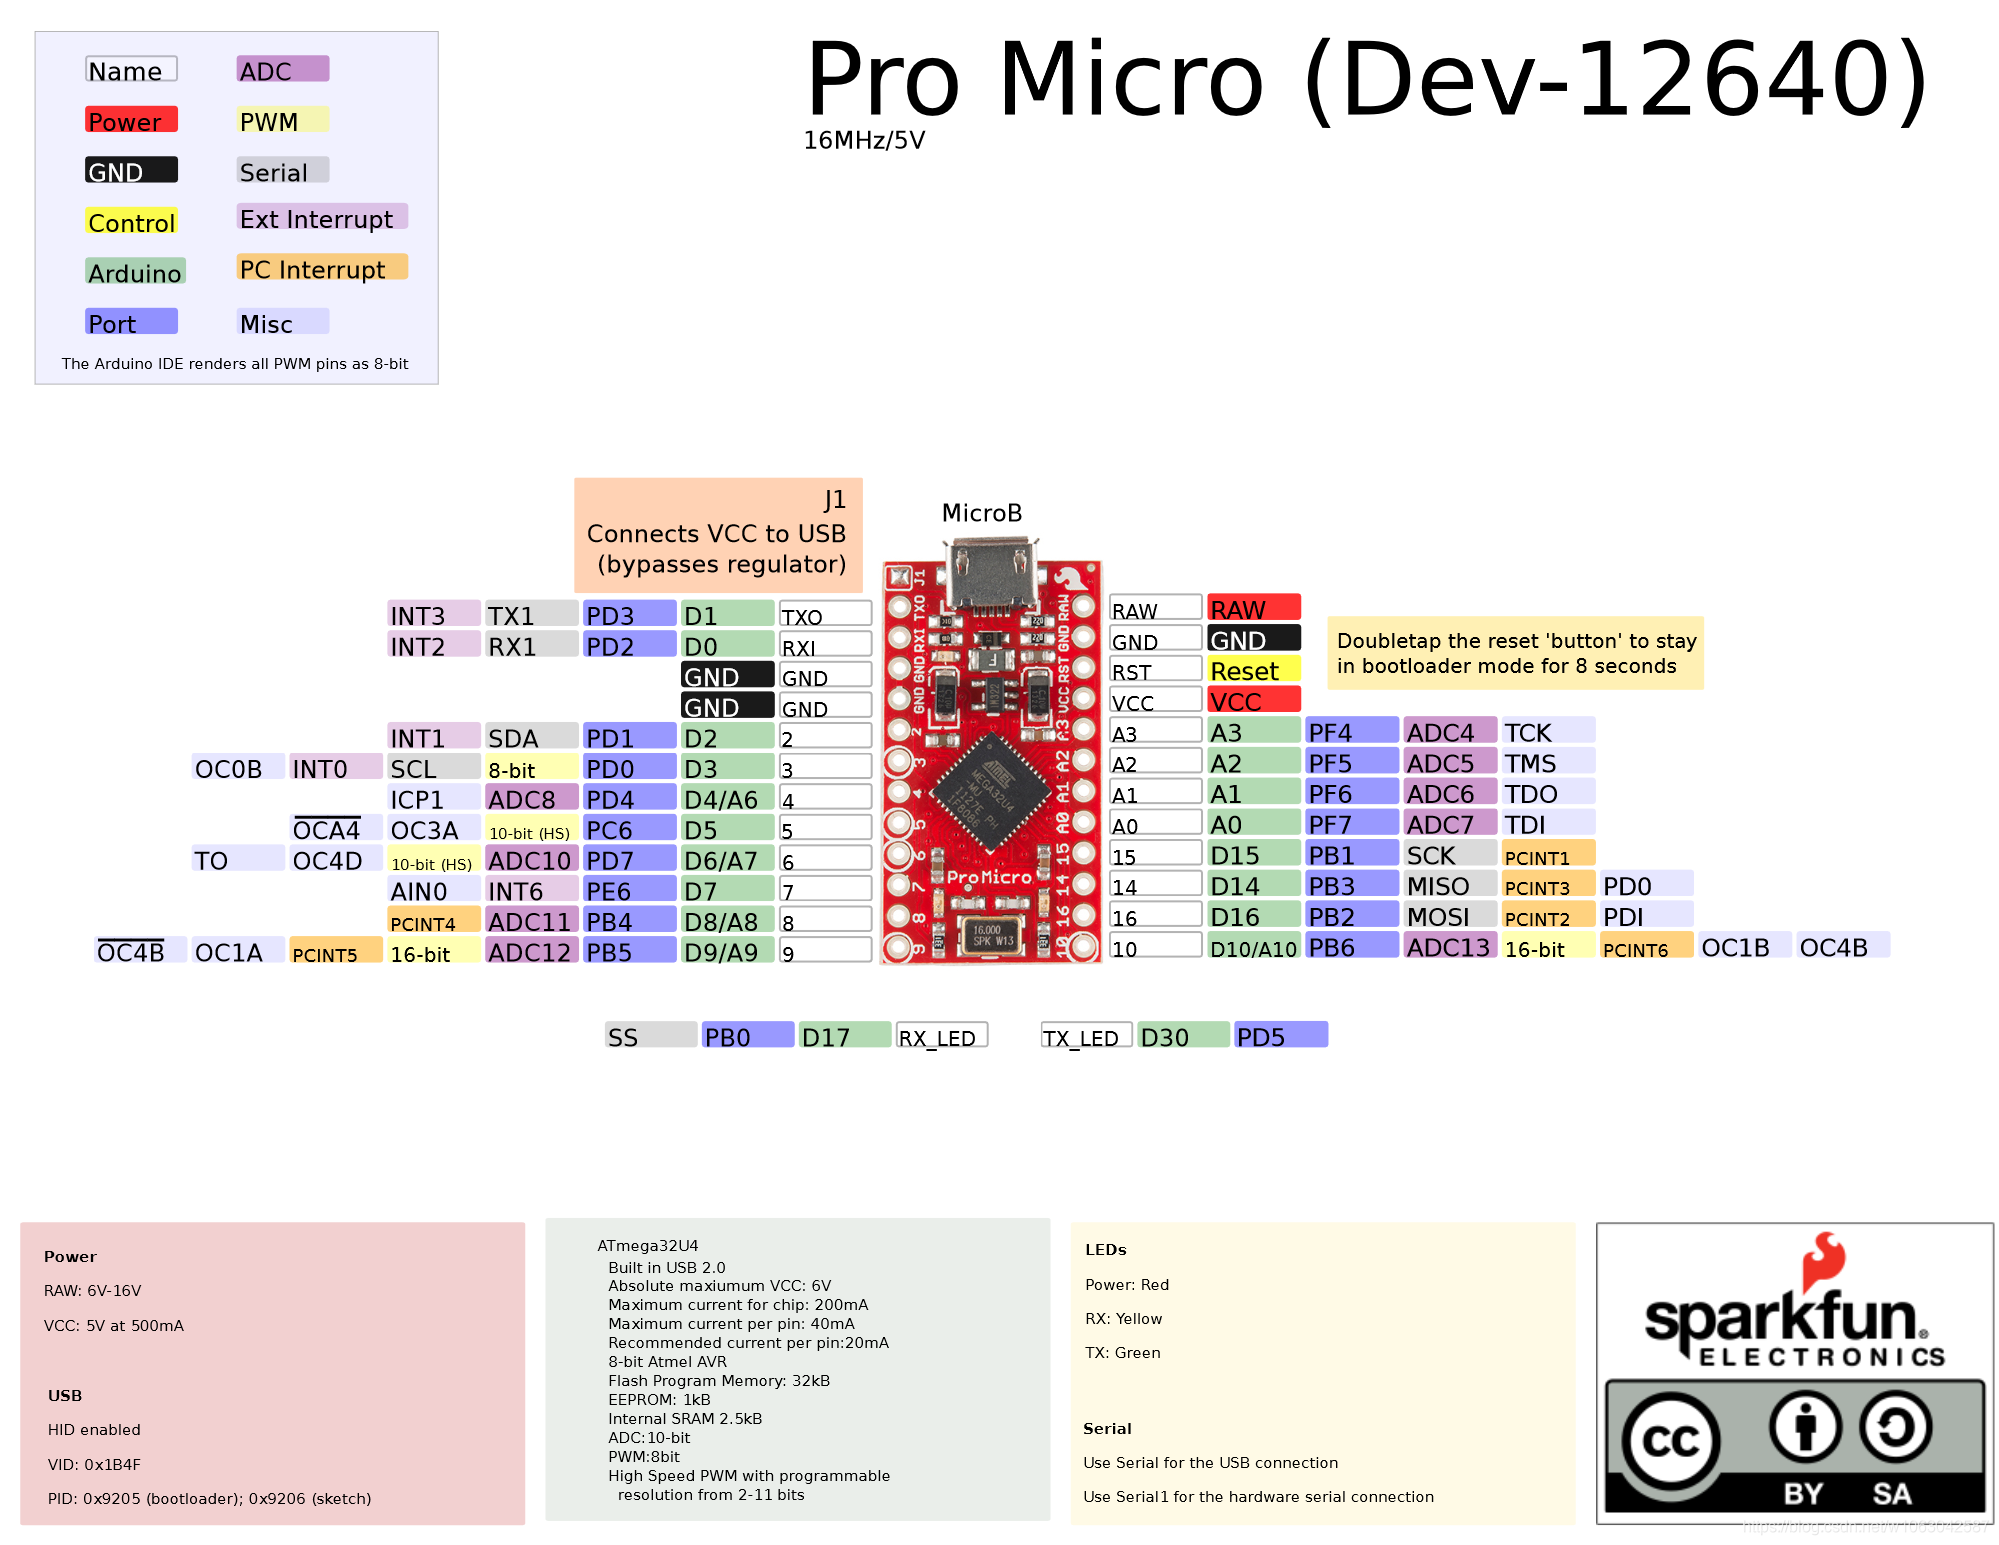
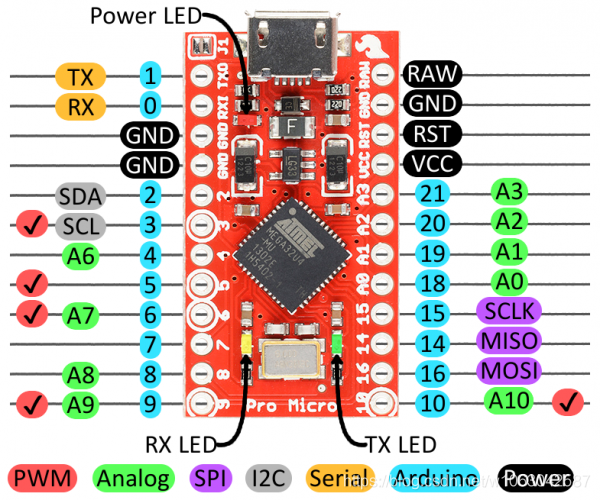
二、引腳定義
如下圖:
測試程式:
***********************************************
int RXLED = 17; // The RX LED has a defined Arduino pin
// The TX LED was not so lucky, we'll need to use pre-defined
// macros (TXLED1, TXLED0) to control that.
void setup()
{
pinMode(RXLED, OUTPUT); // Set RX LED as an output
// TX LED is set as an output behind the scenes
Serial.begin(9600); //This pipes to the serial monitor
Serial1.begin(9600); //This is the UART, pipes to sensors attached to board
}
void loop()
{
Serial.println("Hello world"); // Print "Hello World" to the Serial Monitor
Serial1.println("Hello!"); // Print "Hello!" over hardware UART
digitalWrite(RXLED, HIGH); // set the LED on
//TXLED1; //TX LED is not tied to a normally controlled pin
delay(1000); // wait for a second
digitalWrite(RXLED, LOW); // set the LED off
//TXLED0;
delay(1000); // wait for a second
}
***********************************************


留言
張貼留言